

A tent’s capacity rating says little about how comfortable a night will be.
At a campsite, two tents marked “four-person” can feel nothing alike. A drive-up model may fit wide sleeping pads and bags; a hiking model may fit four narrow pads with barely any floor left. Capacity counts sleepers, not comfort—and neither label reveals how easily the tent fits its intended trip.
For car camping, floor space and standing height may justify a larger, heavier shelter. On a backpacking trip, packed weight and size matter more, but weather protection cannot be an afterthought. Fly coverage, vestibule space for wet gear, and how quickly the tent pitches in wind or rain can matter more than a tempting price.
Match the tent to the trip
- How it gets to camp
A car-camping tent can prioritize standing room and easy entry. For a backpacking trip, compare packed weight and pole length as well as floor space; a tent is only useful if it fits the pack and carrying plan.
Look forA packed size and weight suited to the transport method.AvoidChoosing by pitched dimensions alone. - Who sleeps inside
Check the floor dimensions against the actual sleeping pads, not just the advertised capacity. Allow room for a dog or child, and check whether doors and vestibules let sleepers enter and store wet gear without climbing over one another.
Look forEnough usable floor and vestibule space for the group.AvoidTreating a capacity rating as a comfort rating. - How long it stays pitched
On a one-night fair-weather stop, a compact shelter may suffice. Several wet days make a larger vestibule, reliable ventilation, and comfortable seated space more valuable, especially when cooking gear and muddy footwear need covered storage.
Look forLivable covered space for the expected trip length.AvoidOptimizing solely for sleeping space. - What weather the site faces
A three-season tent covers most spring-to-fall trips. The case for winter-specific construction is sustained snow loading and severe exposure, not extra warmth. Set the required wind resistance, rain protection, and snow-load capability before comparing models.
Look forWeather protection matched to the exposed site.AvoidBuying a four-season tent as a substitute for warm bedding.
Choose a shape that suits the campsite
A cabin tent puts near-vertical walls around its floor, giving campers room to stand, change clothes, and move around cots. That comfort usually comes with more fabric, longer poles, a larger packed bundle, and broad walls that catch wind. It makes most sense for drive-in campsites where living space matters more than carry weight.
A dome tent trades some standing room near the edges for curved walls and a more compact frame. It is often easier to transport and presents less surface to a gust than a similarly sized cabin, though a roomy family dome can still be heavy. Low-profile backpacking tents cut height and pole length further; they fit a pack and reduce wind exposure, but sitting up, dressing, and storing gear may feel cramped.
Shape alone does not determine storm strength. Pole diameter and layout, fly coverage, fabric tension, stake holding power, and properly placed guylines all affect whether a tent stays stable. A well-anchored cabin on sheltered ground may fare better than a poorly pitched dome on an exposed ridge.
Instant tents speed arrival by keeping parts of the frame attached. The trade-off is often a bulkier packed shape, hinged joints that can be harder to replace than separate poles, and fewer pitching options. For frequent short car-camping stops, those minutes saved may be worthwhile; for tight storage, remote repairs, or flexible fly setup, a conventional tent is usually the safer choice.
Measure the space people can use
A tent’s capacity rating usually counts sleeping places, not comfort. Manufacturers may fit occupants on narrow pads placed edge to edge, with little room for bags or a route to the door. That distinction matters when considering whether four adults can share a four-person tent comfortably.
Start with the pads that will actually travel. Add their widths, then allow space between sleepers and beside the walls. For example, two 25-inch-wide pads, a 6-inch gap, and 4 inches on each outer side require 64 inches of usable width. Check the tent’s stated floor width at the sleeping end: a tapered floor may be narrower there than its headline dimension suggests.
Length needs the same check. An 80-inch pad against a sloping wall can leave a sleeper’s feet or sleeping bag pressed into the fabric, even when the floor measures 84 inches long. Taller campers should compare pad length with tents that provide genuine sleeping length, paying attention to where the walls begin to slope rather than floor length alone.
Finally, map everything that will not fit on a pad: packs, a dog, or space to dress. A vestibule can shelter boots and packs, but only if it is large enough without blocking the entrance. Check whether each sleeper can reach a door without crossing another pad. For headroom, compare seated or standing height across the area where people will move—not just at the tent’s highest point.
Check how the tent keeps rain out
A tent stays dry when its parts work together. Start with the rainfly: a full-coverage fly should extend low over the walls and shield doors and vents, while leaving enough space between fly and inner tent for airflow. A short fly may save weight, but wind-driven rain can reach exposed mesh or fabric.
Next, inspect where water collects and enters:
- Floor: A bathtub floor raises the floor-to-wall seam above wet ground. A footprint should sit beneath the floor, not protrude beyond it and catch runoff.
- Seams and zippers: Look for taped or otherwise sealed seams at the fly and floor. Door flaps or protected zipper designs help keep rain off the opening.
- Vestibule: Covered space outside the sleeping area allows wet shoes to stay out and provides shelter when the door opens.
The pitch matters just as much as the design. Stake the floor without twisting it, tension the fly so it sheds water, and use guy lines where provided; a loose fly can sag against the inner tent or pool rain. Choose ground that drains rather than a hollow that gathers runoff.
Only then compare hydrostatic-head ratings, which measure a fabric’s resistance to water pressure. Higher figures can matter for floors pressed against wet ground, but they cannot fix an exposed doorway, leaking seam, or badly tensioned fly.
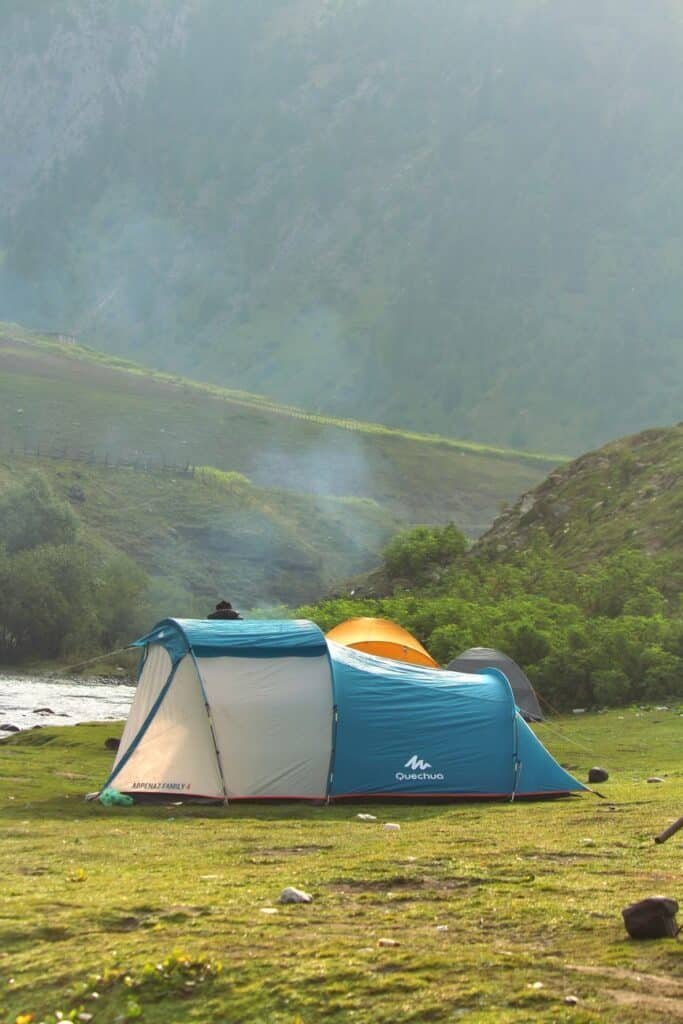
Product photos can reveal whether the fly covers the door, where runoff lands, and whether the vestibule has room for wet gear.
Manage moisture inside the tent
A wet inner wall does not always mean the tent leaks. People exhale moisture overnight, while damp clothing, wet gear, and saturated ground add more. When that vapor meets a cool fly or wall, it condenses into droplets—even when no rain has fallen. Condensation often appears across broad surfaces, especially by morning; a leak is more likely to leave a localized wet patch near a seam or opening during rain. The clues behind a wet tent on a dry night can help distinguish the two.
Ventilation reduces the buildup. Mesh inner walls let vapor pass through, while low openings admit air and high vents release warm, moist air. A taut fly held clear of the inner tent maintains an airflow gap and makes it less likely that droplets on the fly will transfer to the sleeping area.
Choose well-drained ground rather than a damp hollow, and keep wet gear in the vestibule when possible. In wind-driven rain, close or reposition exposed vents while leaving sheltered ones open. Ventilation helps, but humid or cold conditions can still produce some condensation.
Check the pitch, not just the tent
A tent’s floor dimensions are not its full campsite footprint. Even a freestanding tent needs anchors for its vestibules and fly, while guy lines require space beyond the walls. Before choosing a large shelter, consider whether typical tent pads leave room to tension every line without crossing a path or neighboring site.
Anchors must suit the ground. Standard stakes hold well in firm soil but may pull free from sand or loose gravel; wider sand stakes, snow anchors, or secured rocks may be needed where permitted. Choose a level spot away from runoff, then pitch the fly taut enough to shed rain without distorting the frame.
A footprint shields the floor from abrasion, but it should sit entirely beneath the tent floor. An exposed edge can catch rain and channel it underneath. Before departure, practice the complete pitch—including fly and guy lines—and time it with the actual crew. If rain is likely, learn whether the model supports a fly-first pitch; otherwise, keep the inner tent covered and ready to raise promptly.
Consider durability and lifetime costs
Price matters less than what survives repeated pitches and can be replaced. Aluminum poles generally offer a better strength-to-weight balance than cheaper fiberglass, which can splinter when it breaks. Check whether matching pole sections, shock cord, and clips are sold separately; replacing a proprietary frame can be expensive. Carry a repair sleeve and tape: a broken pole can be stabilized at camp, but the fix is temporary.
Fabric weight alone does not predict lifespan. Coating quality and seam construction affect rain protection, while abrasion resistance matters most on floors. Test door zippers around corners: snagging fabric or a strained opening can wear out sliders. Budget for suitable stakes if the included wire pegs bend in hard ground or pull free in sand.
For car camping, added pole and fabric weight may be a fair trade for longevity. For backpacking, compare carried weight, including fly, poles, stakes, and any necessary footprint, rather than an advertised minimum. Check warranty exclusions and replacement-part availability; damage from use may not qualify as a defect.
After a wet trip, dry the tent completely before storage, including floor folds and stuff sacks. Drying takes time and space, but stored moisture can encourage mildew and damage coatings. Those upkeep and repair costs belong in the purchase decision.
Test the shortlist before the trip
-
Rule out tents that cannot handle the route
Start with the most exposed campsite likely, not the average forecast. Then reject any tent whose packed size or complete carried weight makes transport impractical.
-
Check the sleeping space
Compare the floor and sloping walls with the actual pad dimensions. Allow room for occupants to enter and exit without climbing over one another.
-
Compare setup demands
Consider how many stakes, adjustments, and hands a secure pitch requires—especially when arriving after dark or in rain.
-
Price the whole ownership period
Include any separately sold footprint, suitable stakes, replacement parts, and likely repair costs rather than comparing sticker prices alone.
-
Pitch the finalist at home
Set it up with the intended pads and gear. Check door access and storage, account for every part, and repeat any unfamiliar steps before departure.
The best choice is the tent that meets the trip’s hardest requirements without imposing unnecessary weight, awkward sleeping arrangements, or setup work. A home pitch turns specifications into a practical fit check while there is still time to exchange the tent or replace a missing part.
CampEquipmentPlus relies on reader support. Purchases made via links on our website may earn us an affiliate commission at no extra cost to you, helping keep the site running.