


CampEquipmentPlus relies on reader support. Purchases made via links on our website may earn us an affiliate commission at no extra cost to you, helping keep the site running.
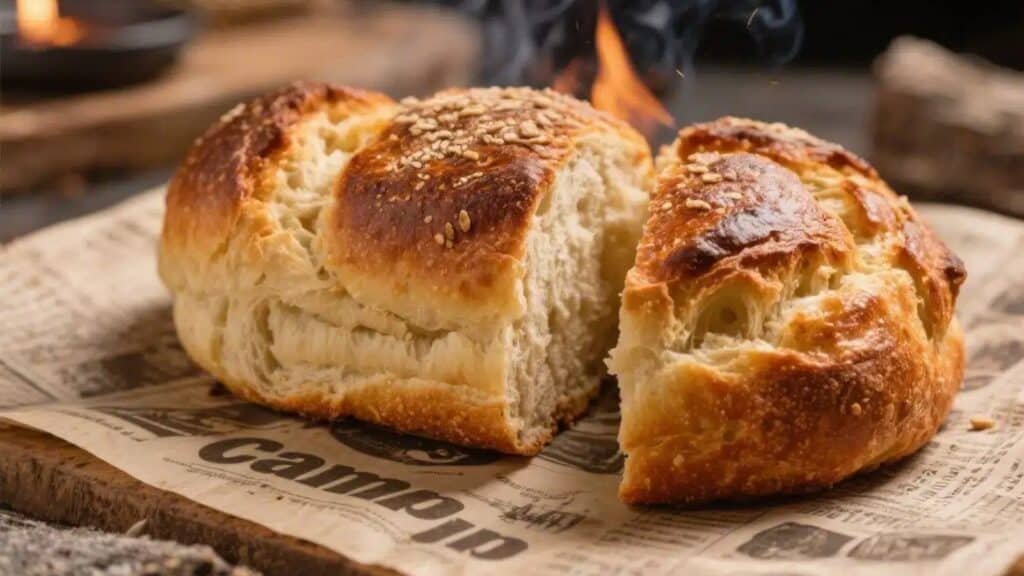
Campfire bread is one of those little camping joys that feels almost magical. A few basic ingredients, a warm fire, and you’ve got fresh bread with a crackly crust and a soft, steamy center. It’s easy enough for beginners and flexible enough to make your own.
You can twist it on a stick, cook it in a skillet, or bake it in a Dutch oven. Whether you’re at a campsite or your own backyard fire pit, this is a recipe that brings people together.
What Makes This Special
This bread is all about simplicity and flexibility. You don’t need a mixer, a special oven, or perfect technique.
The dough is forgiving, and the fire does most of the work.
- Three cooking methods: stick bread, skillet bread, or Dutch oven loaf—use what you have.
- Minimal ingredients: pantry staples you probably already own.
- Great flavor: smoky edges, toasty crust, and a tender inside.
- Customizable: add herbs, cheese, garlic, or cinnamon sugar.
- Fun to make: perfect for kids and group cookouts.
Ingredients
- 3 cups all-purpose flour (plus extra for dusting)
- 2 teaspoons baking powder or 1 teaspoon instant yeast (see notes in Alternatives)
- 1 teaspoon fine salt
- 1 tablespoon sugar or honey (optional, adds browning and flavor)
- 2 tablespoons olive oil, melted butter, or neutral oil
- 1 to 1 1/4 cups warm water or milk (start with 1 cup; add more as needed)
- Optional add-ins: 1 teaspoon dried herbs (rosemary, thyme), 1/3 cup shredded cheese, 1 clove minced garlic, or 1/2 teaspoon cinnamon
- For finishing (optional): extra oil or butter for brushing, flaky salt, cinnamon sugar, or grated Parmesan
How to Make It

- Set up your fire. You want steady, medium heat with glowing coals, not big flames. If using a grill, aim for 375–425°F. For a Dutch oven, have a bed of coals ready and some for the lid.
- Mix the dry ingredients. In a large bowl, stir together flour, baking powder (or yeast—see Alternatives), salt, and sugar if using.Add any dried herbs at this stage.
- Add the wet ingredients. Pour in oil and 1 cup warm water. Stir with a spoon or your hands until a shaggy dough forms. If it’s dry, add more water a tablespoon at a time.
- Knead briefly. Dust your hands and the dough lightly with flour.Knead in the bowl or on a board for 1–2 minutes until smooth-ish. This dough should be soft but not sticky.
- Rest the dough. Cover the bowl with a towel and let it sit 10–15 minutes. This relaxes the gluten and makes shaping easier.If you used yeast, rest 30–45 minutes to puff slightly.
- Choose your method.
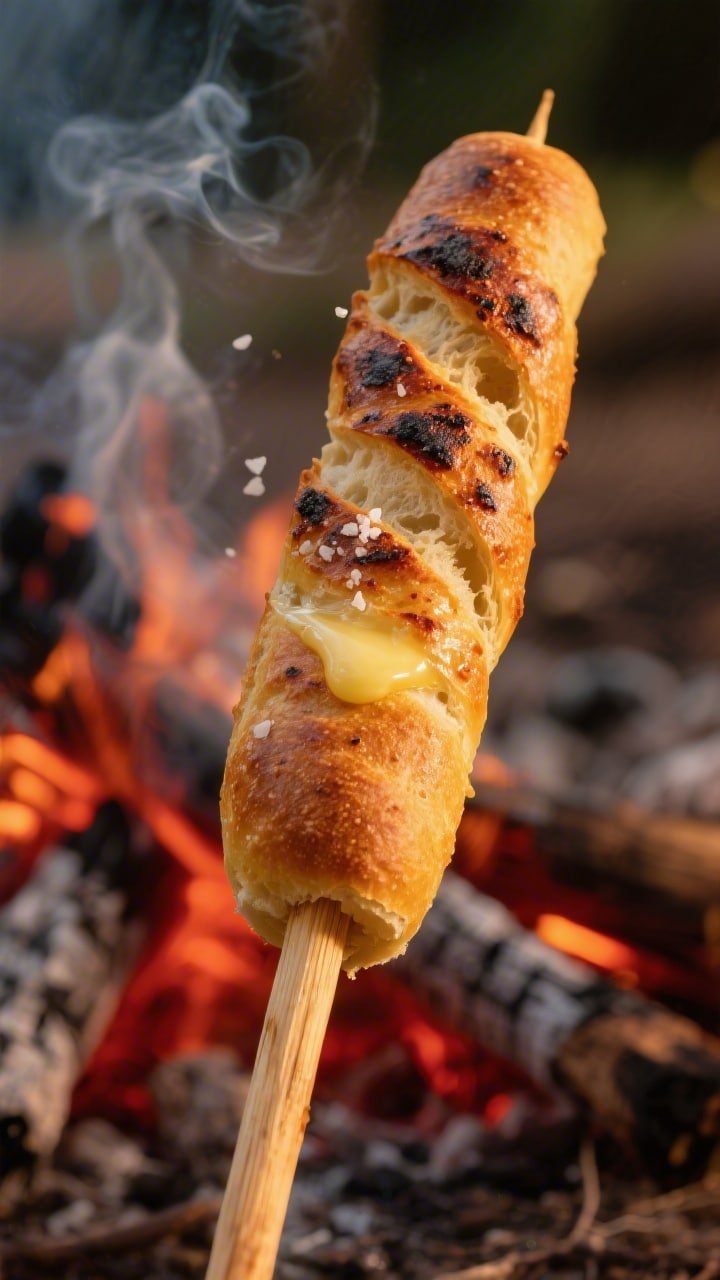
- Stick Bread: Divide dough into 6–8 pieces. Roll into ropes, then spiral around a clean, thick stick. Pinch the ends to seal.
- Skillet Bread: Pat the dough into a round about 3/4-inch thick.If your skillet is small, make two rounds. Lightly oil the skillet.
- Dutch Oven Loaf: Shape into a round ball. Place on a small piece of parchment or lightly oiled bottom.
- Cook over coals.
- Stick Bread: Hold the wrapped dough over low flames or near coals, rotating often, 8–12 minutes total.It’s done when it’s golden, firm, and sounds hollow when tapped.
- Skillet: Place the skillet over medium coals. Cook 6–8 minutes until the bottom is deeply golden, then flip and cook another 5–7 minutes. Brush with butter if you like.
- Dutch Oven: Put the dough inside, cover with the lid, and set over a steady bed of coals.Place some coals on top. Bake 20–30 minutes, then check. If pale, add more coals and bake 10–15 minutes more.It’s done when the crust is browned and the center hits about 200°F.
- Finish and serve. Brush with butter or oil and sprinkle with flaky salt, garlic powder, or cinnamon sugar. Let cool a few minutes, then tear and share.
Storage Instructions
- Short term: Wrap cooled bread in a clean towel or foil. It stays good at room temperature for up to 24 hours.
- Longer storage: Seal in an airtight bag or container for 2–3 days.Rewarm in a skillet or over coals to refresh the crust.
- Freezing: Freeze for up to 1 month. Thaw at room temperature, then reheat in a covered skillet for 5–10 minutes.
- Tip: Leftover bread makes great croutons. Cube, oil, season, and toast in a skillet over the fire.

Benefits of This Recipe
- Beginner-friendly: No fancy tools or strict timing.
- Versatile: Works as savory or sweet, side or snack.
- Budget-friendly: Uses inexpensive pantry staples.
- Interactive: Fun for kids to shape and cook their own pieces.
- Reliable outdoors: The dough is forgiving and handles uneven heat well.
Common Mistakes to Avoid
- Cooking over big flames: Flames scorch the outside while the inside stays raw.Aim for glowing coals and moderate heat.
- Too much flour: Over-flouring makes tough bread. Keep the dough soft; dust lightly only when needed.
- Skipping rest time: Resting helps the dough relax and cook evenly. Even 10 minutes makes a difference.
- Not rotating stick bread: Hold and turn it often.Keep it moving for even browning.
- Overcrowding the skillet: Give it room so steam can escape and the crust can crisp.
Alternatives
- Yeast vs. baking powder: Baking powder gives quick bread with a biscuit-like crumb. Instant yeast adds chew and a deeper flavor—use 1 teaspoon yeast, rest 30–60 minutes.
- Flour swaps: Use up to 50% whole wheat for nuttier flavor; add a splash more water if it feels dry. Gluten-free blends work if they contain xanthan gum; dough will be stickier, so cook as skillet bread.
- Dairy boosts: Replace water with milk or buttermilk for a softer crumb and richer taste.
- Flavor twists: Try garlic and herb, cheddar and green onion, jalapeño and corn, or cinnamon sugar with a drizzle of honey.
- No fire option: Bake in a 425°F oven—12–15 minutes for flat skillet rounds, 25–35 minutes for a small loaf.
FAQ
How do I know when the bread is cooked through?
Look for a deep golden crust and a hollow sound when you tap the bottom.
For Dutch oven loaves, an instant-read thermometer should read about 200°F in the center. Stick bread should feel firm all the way around and pull off the stick cleanly.
Can I make the dough ahead of time?
Yes. Mix the dough up to a day in advance.
For baking powder dough, chill it tightly covered and bring to room temp before cooking. For yeast dough, let it rise once, punch down, refrigerate, and use within 24 hours.
What kind of stick should I use for stick bread?
Use a clean, sturdy green stick about 3/4 to 1 inch thick. Peel the bark where the dough will sit.
Avoid resin-heavy woods like pine; hardwoods like maple or oak are better. You can also use a metal skewer.
How do I prevent the outside from burning?
Cook over coals, not flames. Hold the bread a bit higher above the heat and rotate constantly.
If it’s browning too fast, move it to a cooler zone and give it more time.
Can I add toppings while it cooks?
Yes, but keep it simple. Brush with butter or oil, then sprinkle salt, garlic powder, or cinnamon sugar toward the end of cooking so it doesn’t burn. Cheese can be added in the last few minutes.
What if I don’t have a Dutch oven?
Use a heavy skillet with a lid, or make flatbreads directly on a griddle or clean grate.
You can also wrap dough in foil with a little oil and cook near coals, flipping halfway.
Is this safe for kids to make?
Yes, with supervision. Let kids shape their dough, then have an adult manage the fire and handle hot equipment. For stick bread, adults should help hold and rotate the sticks.
In Conclusion
Campfire bread is simple, cozy, and endlessly adaptable.
With a few ingredients and steady coals, you can turn a campout—or a backyard evening—into something special. Keep the heat moderate, rotate often, and don’t stress the details. Tear it, share it, and enjoy the warm, smoky goodness while it lasts.
Printable Recipe Card
Want just the essential recipe details without scrolling through the article? Get our printable recipe card with just the ingredients and instructions.